Using Plastic Filament with LEDs
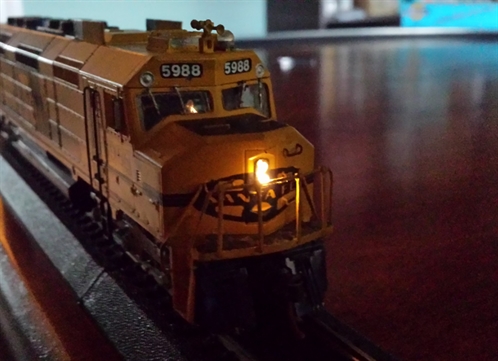
I discovered that using plastic filament for model railroading is an excellent way to create "bulbs" and to extend light in places you wouldn't normally be able to. They transmit the light from an LED through the length of the filament and it makes the end glow. It is bright enough to use for headlights.
I use 1mm diameter filament with 3mm LEDs in every loco I modify. 2mm and 4mm heat-shrink tubing is required as well. Here's how:
(note: sometimes in the USA metric sizes are not as common, so some people are going to have 1/8" instead of 2mm heat shrink. The idea is to wind up with a 1mm spacer to go around the filament. 1/8" shrinks down to 1/16" which is a little loose, but still works. You can also use insulation from some 20 gauge wire, or even some electrical tape rolled around the filament)
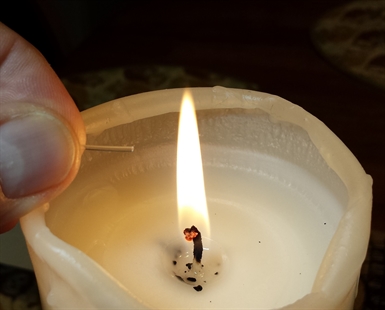
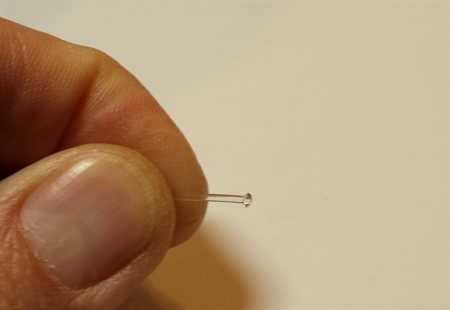
To cut the filament, score with a hobby knife and bend away fron the break until it snaps apart. If desired, you may use a candle to "blossom" the filament end to make a bulb. Hold the end of the filament close to an open flame. The hotter you get it, the larger the blossom. The limit is about 2x the diameter of the filament. Creates a nice "bulb" effect and makes the light brighter.
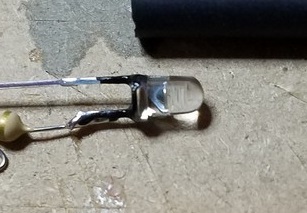
After soldering the resistor to the LED, paint the back of the LED with some black paint. I use acrylic which dries pretty fast, especially if I use my mini heat gun on it.
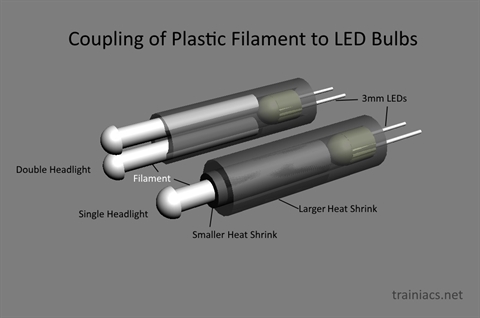
Use heat-shrink tubing to "couple" filament to LED. If using one piece of filament, pre-shrink 2mm tubing BEFORE insertng the filament (the filament has a really low melting point!). Put some 4mm heat-shrink tubing over an led and the 2mm shrunk tubing and apply heat. The last step is to insert the filament. Sometimes you want to insert the filament through the loco shell then into the tubing. If the filament does not go in easily, you can apply some grease to it and it will slide in easier.
2mm Heat Shrink (with nothing inside)
4mm Heat Shrink (with LED inside)


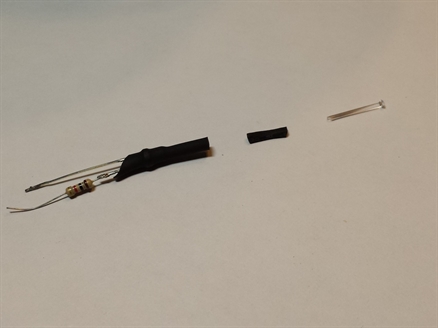
All parts before assembly
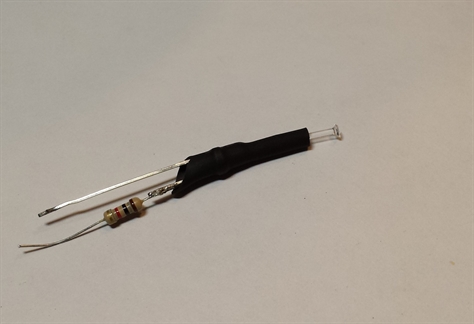
All parts after assembly
Final Steps: Test the LED before installation. To glue it in, I use hot-melt glue applied to the rear area, approximately where I have soldered the resistor to the LED. Don't get any hot-melt near the filament or the tubing surrounding it, or it will melt away!
Athearn Blue Box GP9 Example with double LEDs
I needed double headlight bulbs for a GP9, so I prepared two pieces of filament and they both fit into a 4mm heat shrink without the need of any spacer.
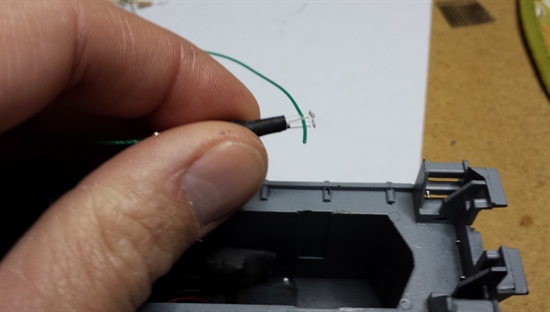
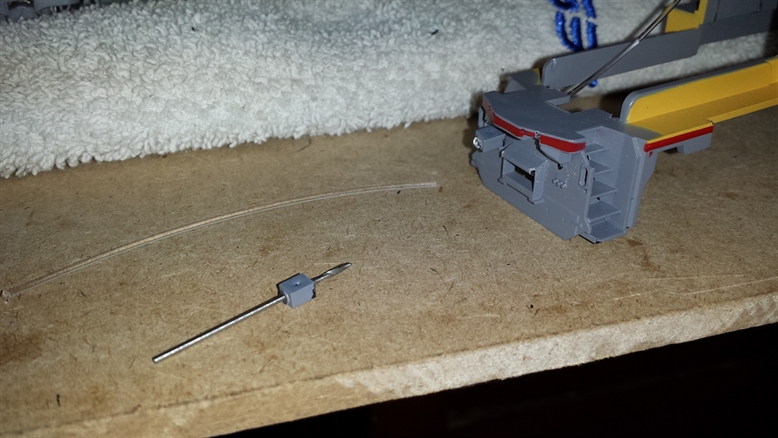
It is pretty tricky to insert the double filament into the shell because the two pieces have no gap between them and you need to create a gap when inserting them into the shell. So this is where a piece of wire comes in handy. Use it to hold the tubes apart, slide them into the holes, and pull out the wire.
You can see here the "blossoms" on the end of the filament, which work nicely as headlight bulbs.
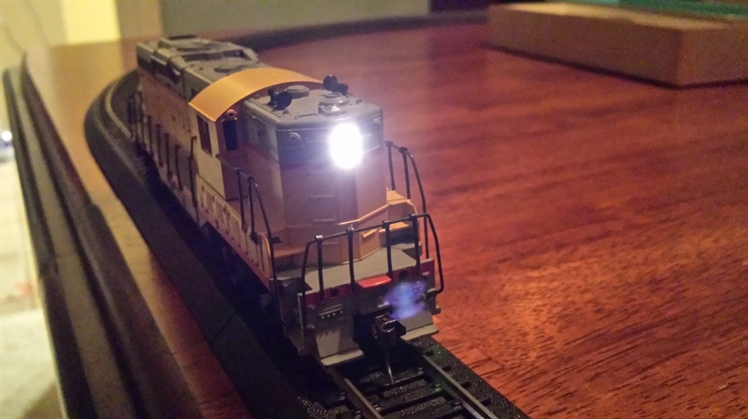
End result. Two nice looking, very bright bulbs
Other applications of plastic filament
Here is a link to and entire build which includes an example of quad bulbs in the rear of an SD40T-2.
Application for using filament for ditch lights
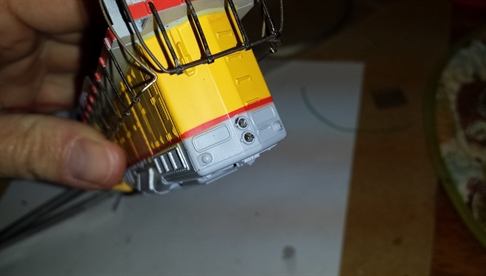
Here is an example of using filament for ditch lights in an Athearn Blue Box AC4400.
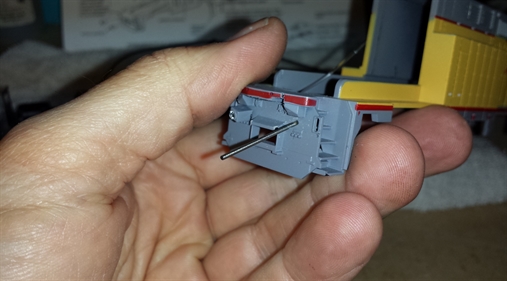
First thing to do is start a hole in the back of the ditch light box with a hobby knife. You are creating a pilot hole for the drill, so center it well. I use a small hand drill to drill the hole, because any powered device is hard to control. You really need to try to exit the front right in the middle where the bulb is. Repeat the process with the second ditch light.
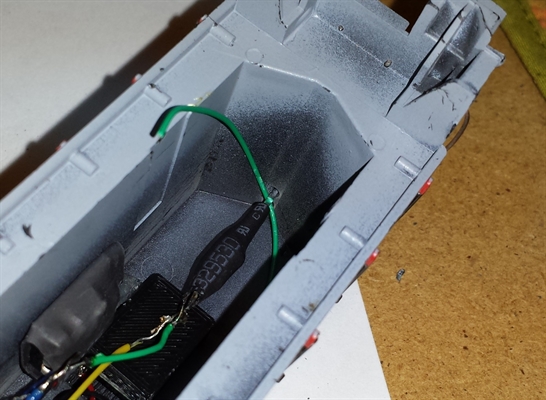
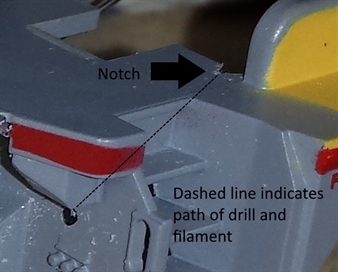
Next, drill out the peg hole in the shell to 1mm. When you drill, angle the bit upward because that is the direction the filament needs to go. Once you are through the hole, continue through by drilling a notch in the back of the porch. For this I do use a dremel, because I don't need to be as precise, and it helps to dig the extra notch.
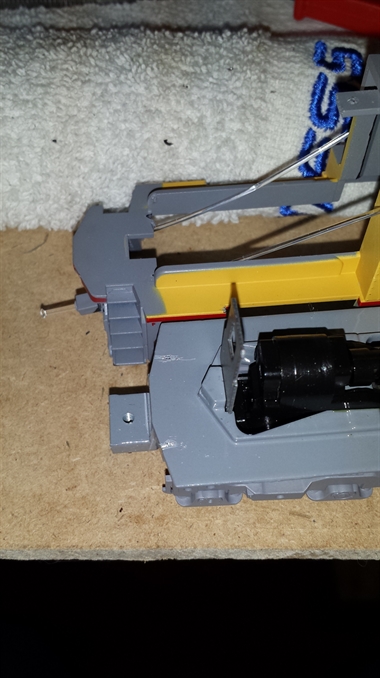
Thread the filament through and place the shell over the frame to mark the frame for milling. Not much material needs to be removed. For this, I use the dremel with a cut-off wheel.
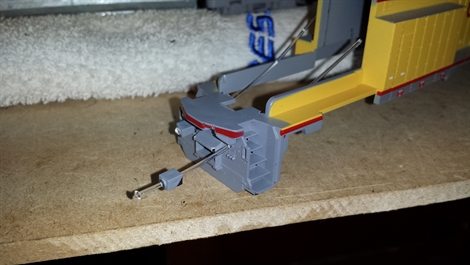
The final step is to test fit, then glue the ditch light boxes to the shell. Once that is done, you just need to attach the filament to LEDs. Use an LED for each one, then wire each to a separate accessory output of the DCC decoder to allow for back-and-forth flashing.